
I thought that the best place to make sure that I can find it again in the future was to steal it and put it on my blog - so that is what I have done - though the links for the original are still attached - copyright and all that stuff, as well as a rather good link to making canons!!!
In the meantime - here is a set of instructions in how to make a medieval door....
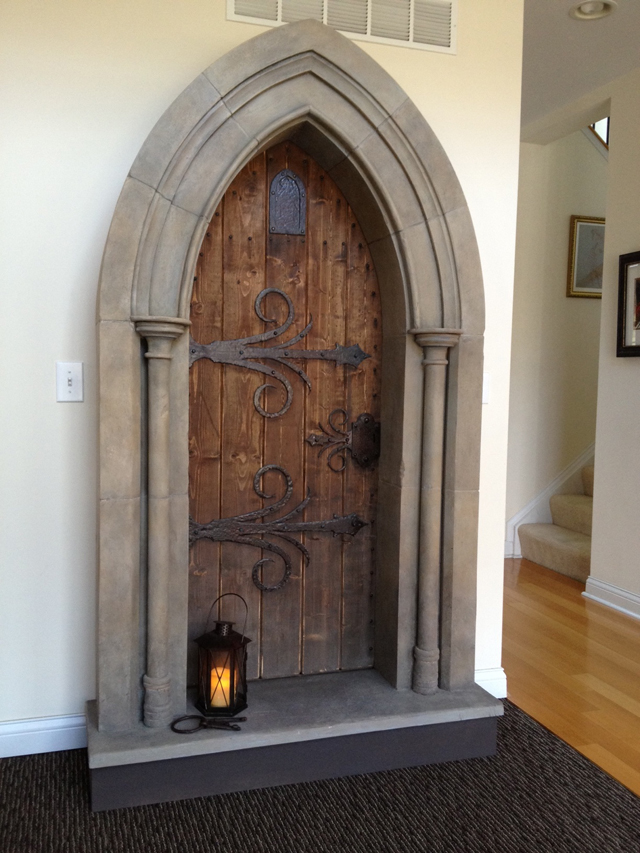
Now that you have two prop cannons and a pirate skeleton, why not a Medieval Doorway to accent your home, provide a bit of mystery and leave your guests wondering, “what’s in that room?”
 Like
with any design, the concept starts with a sketch and a 3-D model to
work out the details and get the proportions right. Solving design
problems at this stage will make the construction process much easier.
Like
with any design, the concept starts with a sketch and a 3-D model to
work out the details and get the proportions right. Solving design
problems at this stage will make the construction process much easier. Choosing
the right materials and creating a parts list from the model saves time
and money. Some of the techniques shown here are similar to theme park
and movie set applications. Stuart Craig,
production designer on the Harry Potter films, refers to himself as “an
architect in plywood”. The sets are typically simple construction and
finished in a heavy coat of faux paint and texture. Sculptural elements
are usually carved in foam and, if need be, coated in fiberglass.
Choosing
the right materials and creating a parts list from the model saves time
and money. Some of the techniques shown here are similar to theme park
and movie set applications. Stuart Craig,
production designer on the Harry Potter films, refers to himself as “an
architect in plywood”. The sets are typically simple construction and
finished in a heavy coat of faux paint and texture. Sculptural elements
are usually carved in foam and, if need be, coated in fiberglass. Careful layout and planning is key to a successful finish. Templates for all the varying shapes can be made directly from the Sketch-Up model.
 Cutting and assembly of the pieces is the next step, making sure the opposite sides of the arch line up.
 Automotive filler, or Bondo, is used to add three dimensional texture, grout lines and cracks.
 The
Bondo and primer process is on-going throughout the construction.
Other moldings and dimensional elements are then added and matched in
texture. A router table with a panel raising bit will shape the curved cove moldings, while a lathe is great for turning the corbels on the top and bottom of the columns.
The
Bondo and primer process is on-going throughout the construction.
Other moldings and dimensional elements are then added and matched in
texture. A router table with a panel raising bit will shape the curved cove moldings, while a lathe is great for turning the corbels on the top and bottom of the columns. Faux
painting and a bit of carving is next. Thin washes of varying tones
and colors provide the look of stone, dirt and age. Splattering,
sponging and dry brushing are techniques that add to the look.
Faux
painting and a bit of carving is next. Thin washes of varying tones
and colors provide the look of stone, dirt and age. Splattering,
sponging and dry brushing are techniques that add to the look. 
The easy part is the door. Simple plank construction, stain and aging.
 MDF is the perfect material for the hinges and provides a great surface for a carved, or forged, texture using a Dremel tool.
 Finally, sculptural details are added and painted to look like iron. This is the same technique used in “How to Make a Pirate Cannon”,.
And there it is. From a pile of plywood and lumber to a finished sculptural piece ready for your next Harry Potter or Murder Mystery Party.
And there you have it - I'll drink to that :)
No comments:
Post a Comment